Fix: The Graphics Driver Could Not Find Compatible Graphics Hardware Installer – Appuals.com
Deprecated: trim(): Passing null to parameter #1 ($string) of type string is deprecated in /home/caocap/public_html/wp-content/plugins/fixed-toc/frontend/html/class-dom.php on line 98
This error is exclusive to NVIDIA users and it appears when try to install a new graphics card driver on their computer. The full error message goes like:
NVIDIA Installer cannot continue – the graphics driver could not find compatible graphics hardware
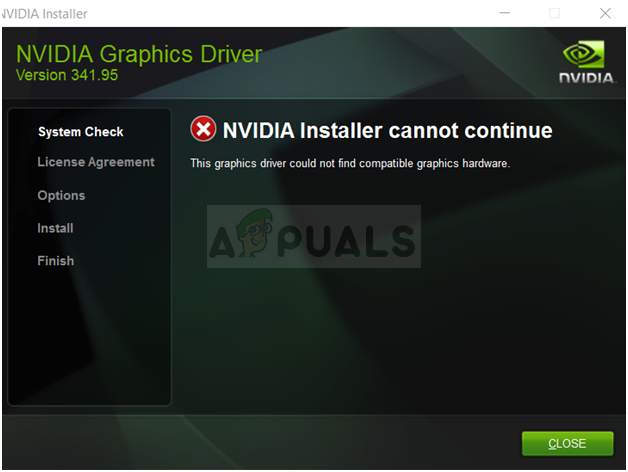
The error message sounds quite self-explanatory if you have indeed downloaded the wrong driver for your graphics card but the error quite often appears to users who have downloaded the correct graphics card and who want to install the latest driver. Check out the methods we have prepared below which should take care of the problem!
What Causes The Graphics Driver Could Not Find Compatible Graphics Hardware Installer Error?
The list of things which cause this error is not long and the problem is often a technical mistake made by NVIDIA. There are two main reasons for the problem:
Solution 1: Create a Device ID for your NVIDIA Graphics Card
This problem can appear because of the fact that your graphics card’s ID is not listed in any of the ‘info’ files the driver uses to recognize what graphics card you have on your computer. This is a rare error and this method will definitely require some work to be done.
This is applicable to users who have decided to manually download the driver’s installation file from the NVIDIA’s website. All examples will refer to a sample file and your file will differ in certain parts which will be mentioned below!
- Click Start and type Run. Select Run, A Run dialog box will appear.
- Type “devmgmt.msc” in the run dialog box and click the OK button. This opens Device Manager immediately.

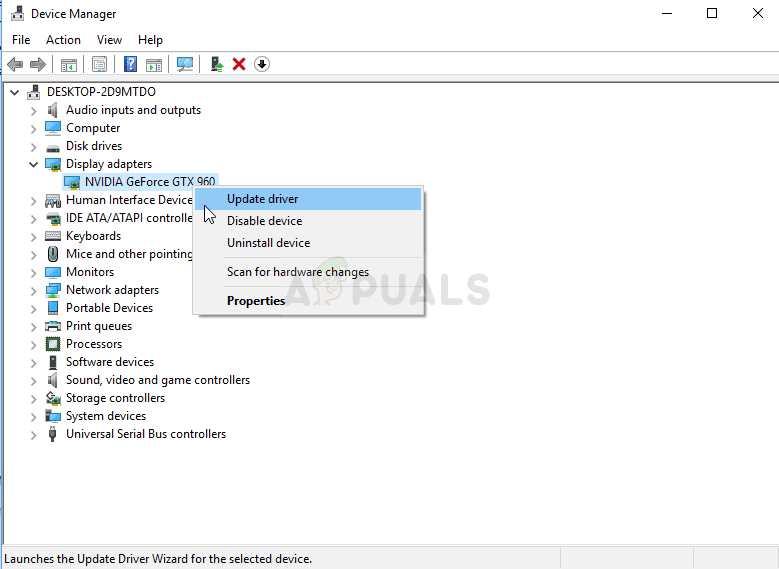
- In Device Manager, expand the Display adapters category by clicking the arrow next to it and locate your NVIDIA graphics card. Make sure you find out the name of your device. There should be no doubt as you don’t want to end up uninstalling the wrong device.
- When you locate the device, right-click on it and choose the Properties option from the context menu.
- Navigate to the Details tab in the Properties window and left-click the menu under the Property text. Choose the Device instance path option and, under Value, you should see a text which should look something like this:
PCIVEN_10DE&DEV_0DD1&SUBSYS_20421043&REV_A1 4&30DE1B
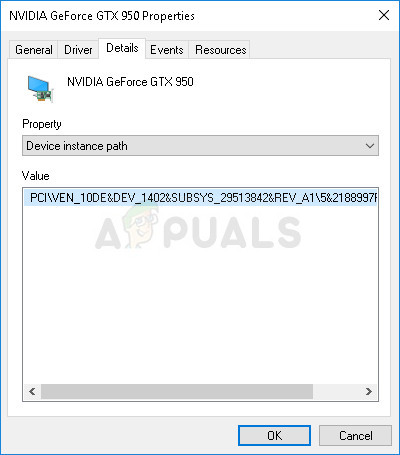
- This text contains information about the video card manufacturer, the chipset and the model. If you have downloaded the driver file from NVIDIA’s website, run it, and you should see the familiar “This graphics driver could not find compatible graphics hardware” message.
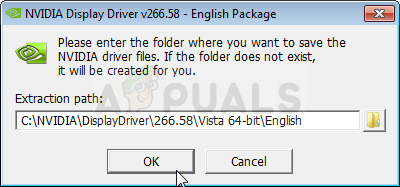
- Don’t worry about it yet. Navigate to the install directory. The default path should look something like the examples below:
C:NVIDIADisplayDriver<DriverVersion><YourVersionOfWindows>EnglishDisplay.Driver C:NVIDIADisplayDriver<DriverVersion><YourVersionOfWindows>InternationalDisplay.Driver
- It’s the same folder you chose at the beginning of the installation so make sure you rerun it to see what it is if you are not sure.
- Open of the files whose extension is ‘.inf’. For example, you can choose the ‘inf’ file. Make a backup copy of this file by right-clicking on it and choosing the Copy option. Paste it anywhere else.
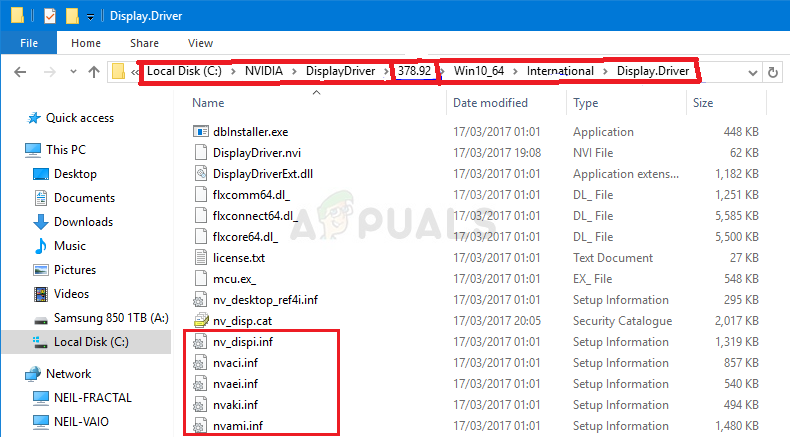
- Right-click on the same file still located in the NVIDIA folder and choose Open with >> Notepad (or any other text editor).
- Scroll down until you see lines looking like this:
Note: If see multiple NVIDIA_SetA_Devices or NVIDIA_Devices sections, repeat the process for all of them!
- You will see that these lines appear quite similar to the Device instance path you took note of in Device Manager. Scroll down until you reach the section which is similar to your chipset number (the number appearing after DEV in Device instance path).
- Now comes the hard part. We are about to create a device ID for the graphics card you have installed on your computer! You will input it in the middle of the list, next to the similar looking chipset numbers.
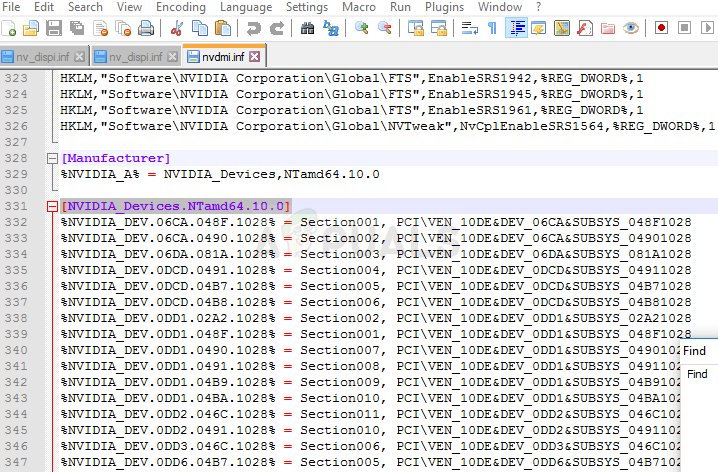
- The first part is the same for everyone: ‘%NVIDIA_DEV’. The next part is the four-character DEV code (appears after DEV in Device instance path). If you notice that there is already the same DEV as yours, you will need to increment it. For example, if the DEV is ODD1 and you see a line starting like this:
%NVIDIA_DEV.0DD1.01%…, your line will start off as %NVIDIA_DEV.0DD1.02%
- The next part is the section. The number should be the same section as the one in which you insert it in so just check the number above. If the line above starts off like this:
%NVIDIA_DEV.ODD1.01% = Section042…, your line should start like %NVIDIA_DEV.ODD1.02% = Section042,
- The final part should simply match your Device instance path. Put a comma after the section part and insert a space. After that, you can simply right-click on your Device instance path in Device Manager, choose copy and paste it here. Finally, the line should look like this:
%NVIDIA_DEV.ODD1.02% = Section042, PCIVEN_10DE&DEV_0DEE&SUBSYS_15621043
- Use the Ctrl+S key combination in order to save the changes. Run the setup file manually from the NVIDIA install directory. It should be the same folder where you have located the ‘.inf’ file and it should be named ‘setup.exe’.
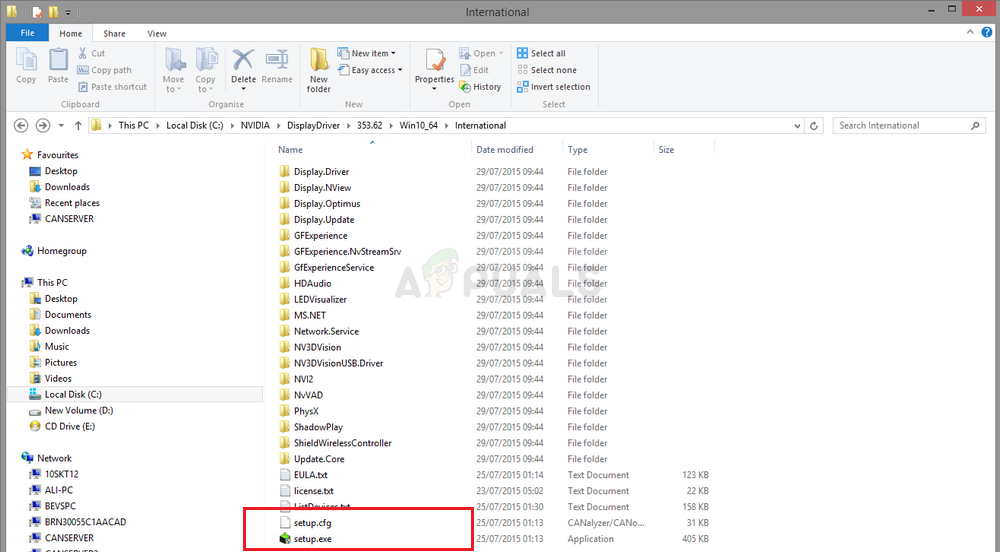
Note: If you run the file you have downloaded from NVIDIA’s website, everything you have done will be overwritten and you will be forced to start again!
- Check to see if the problem is resolved! The answer may be long but it works!
Solution 2: Disable the Driver Signature Enforcement
This option disables the driver signature enforcement which may be one of the reasons for why your drivers refuses to be installed. This simple solution has helped plenty of folks so make sure you try it out.
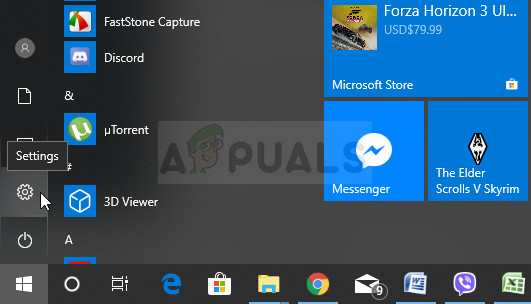
- Click on the Start button and click on the cog icon in order to open Settings. You can also search for “Settings” in the search bar.
- Scroll down to the bottom of the Settings app and click on Update & security.
- Click on Recovery from the tabs located on the left side of the Update & security screen.
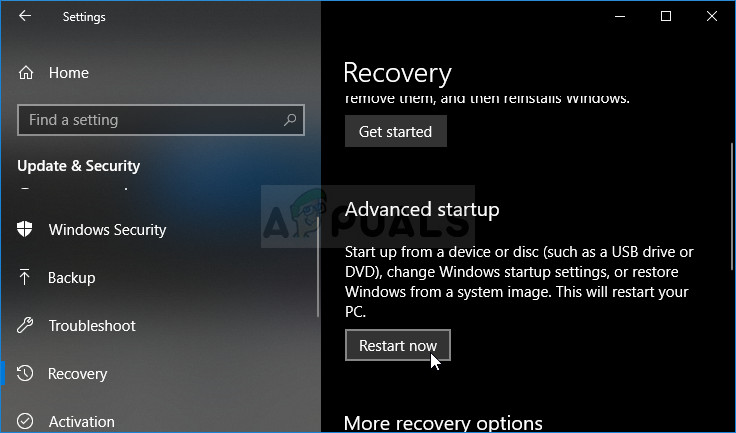
- Advanced startup section should be located in this option so locate it at the bottom of the Recovery tab. Click on Restart now. Advanced Startup Options should appear.
Note: If you are using Windows 8, swipe from the right in order to access the charms bar. Click on the Change PC settings option and choose the Update and recovery from the list. Click on Recovery and follow the steps from 4-6 from the solution above.
After you have successfully accessed the Advanced Startup Options, you can now freely navigate to the Startup Settings option by following the instructions below.
- Click on the Troubleshoot option located just under the Continue button.
- You will be able to see three different options: Refresh your PC, Reset your PC, and Advanced options. Click on the Advanced options button.
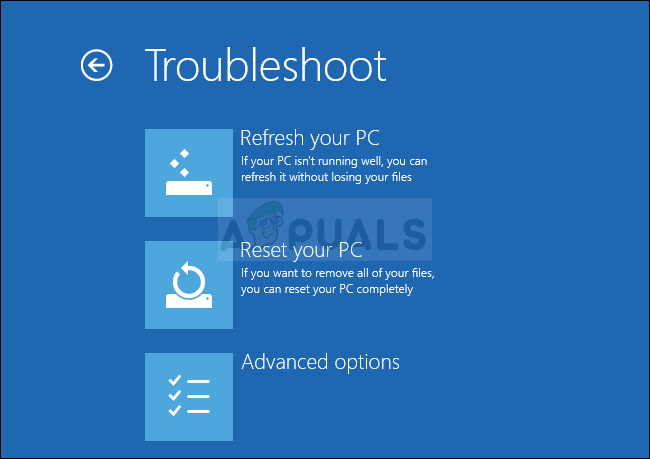
- Under the Advanced options screen, click on Startup Settings which will open a list of available startup options for you.
- The option number 7 should be named Disable driver signature enforcement. Click on the number 7 on your keyboard or use the F7 function key.
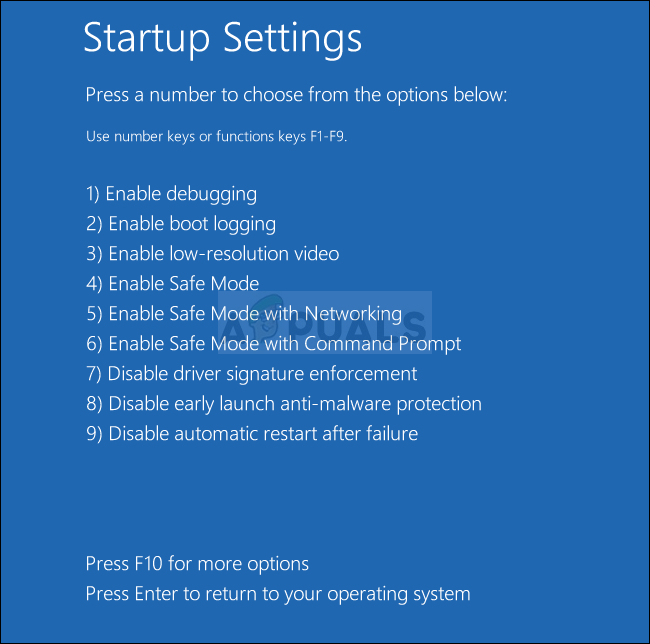
- Press Enter in order to return to your operating system.
- Share CrocoBlock key trọn đời Download Crocoblock Free
- Cung cấp tài khoản nghe nhạc đỉnh cao Tidal Hifi – chất lượng âm thanh Master cho anh em mê nhạc.
- Cách thêm nút “Download” trên YouTube, Facebook,… cho Chrome, Firefox và Opera
- Tìm tham số m để hàm số đạt cực trị tại một điểm cực hay – Toán lớp 12
- Bảng giá xe máy Wave 50cc mới nhất – xe máy giá rẻ
- "Âm mưu và Tình Yêu" lấy nhan sắc chinh phục khán giả ĐBSCL và Hà Nội – friend.com.vn
- Top 100 hình ảnh hoàng hôn trên biển đẹp nhất thế giới
Bài viết cùng chủ đề:
-
Mã GTA bất tử, bản vice city, 3, 4, 5
-
Chơi game ẩn trên Google – QuanTriMang.com
-
Gợi ý 8 phần mềm hiện file ẩn trong USB miễn phí tốt nhất – Fptshop.com.vn
-
Top 100 Pokemon mạnh nhất từ trước đến nay mọi thế hệ – nShop – Game Store powered by NintendoVN
-
Tải ảnh từ iCloud về iPhone bằng 3 cách đơn giản – Fptshop.com.vn
-
Hướng dẫn sử dụng iphone 4s cho người mới dùng toàn tập
-
Get Mass Video Blaster Pro 2.76 Full Modules Cracked Free Download
-
Vẽ đường cong trong cad, cách vẽ đường cong lượn sóng trong autocad
-
Hướng dẫn tạo profile Google Chrome từ A đến Z – Vi Tính Cường Phát
-
Cách tạo ghi chú trên màn hình desktop Windows 10 cực đơn giản – Thegioididong.com
-
Hữu Lộc tử nạn vì đỡ cho con – VnExpress Giải trí
-
Cửa xếp nhựa giá rẻ dùng cho nhà vệ sinh, nhà tắm | Lắp đặt tận nơi – Thế Giới Cửa
-
Review top 4 máy bắn vít DCA nổi bật, chất lượng nhất
-
2 bước thực hiện cuộc gọi video trên Facebook – QuanTriMang.com
-
Dễ dàng sửa lỗi máy tính desktop và laptop không lên màn hình
-
Cách thu hồi, lấy lại tin nhắn SMS lỡ gửi nhầm trên iPhone, Android – Thegioididong.com


