FIX: No speaker or headphones are plugged in [Full Guide]

Th11
Deprecated: trim(): Passing null to parameter #1 ($string) of type string is deprecated in /home/caocap/public_html/wp-content/plugins/fixed-toc/frontend/html/class-dom.php on line 98

There is a common problem circulating on the web about Windows 10 not recognizing audio devices plugged in the machine.
There are many things that can cause this problem depending on your system. However, most of them are fairly easy to fix.
We will go through the most common root causes of the problem and figure out a working solution for these types of issues.
The majority of people complain that after they upgraded their OS to Windows 10 they lost all sound, their devices not being recognized anymore.
There are more than a few people that are still looking for a working solution, not being able to resolve the issue by restarting the computer or plugging the devices in and out.
Along with the No Speaker or Headphones are plugged in problem, you might also encounter some more sound-preventing issues like:
- No speakers or headphones are plugged in Windows 10 – A common issue in Windows 10.
- The speaker headset or headphone is unplugged Windows 10 – A variation of the first issue in Windows 10.
- Audio device not plugged in Windows 10 – The solutions from this article will also solve this issue.
- Headphones not plugged in Windows 10 – Occurs when you’re not able to connect your headphones to a computer running Windows 10.
How can I fix problems with speakers and headphones?
- Update the audio driver
- Re-enable your sound card
- Try your headphones/speaker on another computer
- Re-enable disconnected devices
- Disable the HDMI sound
- Disable Front Panel Jack detection
- Run Sound Troubleshooter
- Restart Windows Audio service
- Perform an SFC scan
- Delete Windows updates
- Perform a System Restore
- No sound in specific apps
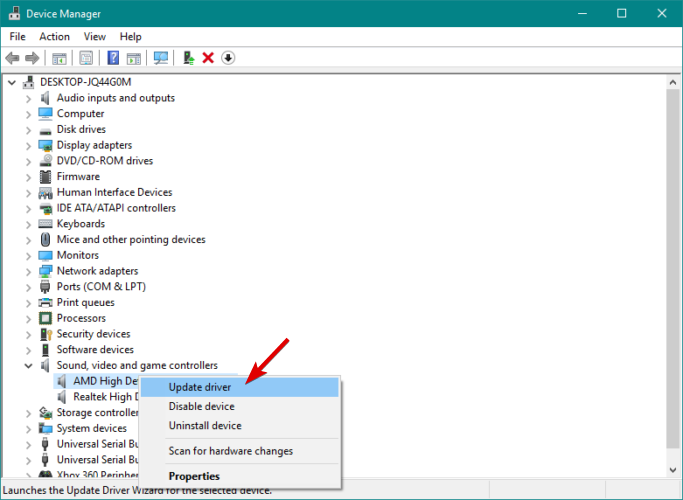
1. Update the audio driver
- Right-click the Start button and select Device Manager.
- Find your audio device, right-click it, and select Update driver.

- If there are any updates, the installation wizard will install them automatically.
- Restart your computer.

Update drivers automatically
Downloading and updating drivers manually can permanently damage your system by installing the wrong versions. In order to prevent that, we strongly suggest doing it automatically by using a third-party program.
We have to mention that this tool will also prevent any damage to your PC by downloading and installing the wrong driver versions. After several tests, our team concluded that this is the best-automatized solution.
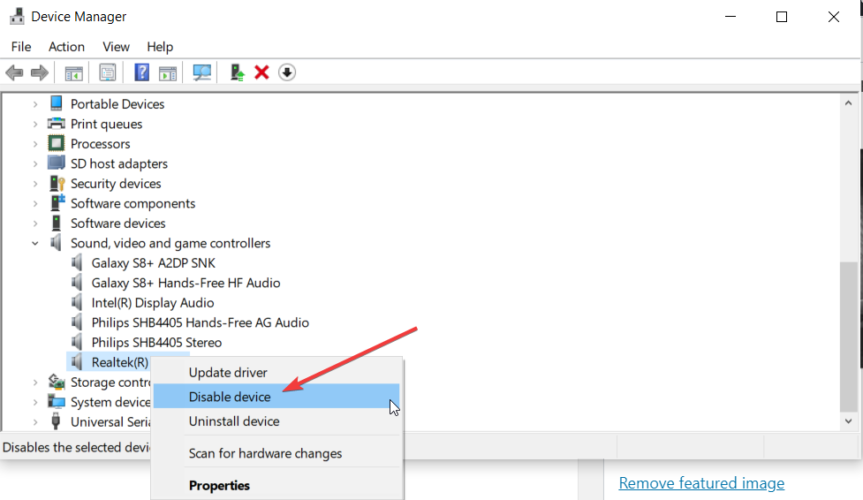
2. Re-enable your sound card
- Go to Search, type devicemngr, and open Device Manger.
- Expand Sound, video and game controllers.
- Right-click your sound card, and select Disable device.
- Restart your computer.
- Go back to Device Manager, and Enable your sound card once again.
- If you can hear sound, your problem is resolved.
If you’re having any sound card issues, solve them quickly with the useful solutions from this expert guide on solving sound card problems.
3. Try your headphones/speaker on another computer
And finally, if none of the solutions listed above worked, try your headphones or speakers on another computer. If you keep receiving the same error, you most likely have a hardware problem.
Maybe it’s also about time to buy new speakers. Check out this nice list of the best PC speakers and choose the one that you like.
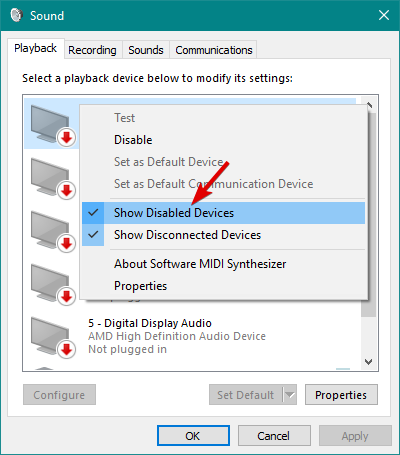
4. Re-enable disconnected devices
- Right-click the sound icon in the Taskbar.
- Click on Playback Devices.
- Right-click anywhere under the Sound window and choose Show Disabled Devices.
- If your device is disabled, simply right-click it and select Enable.
- Restart your computer.
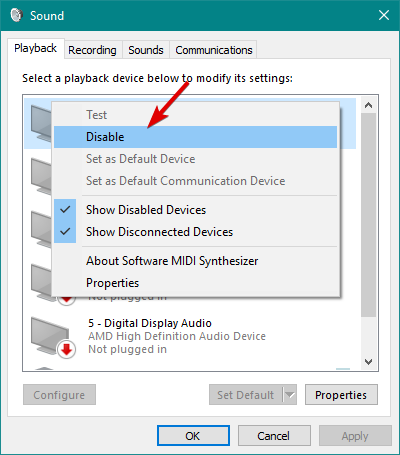
5. Disable the HDMI sound
- Right-click the sound icon in the taskbar.
- Click Playback Devices.
- Right-click the High Definition Audio Device you’re currently using, and select Disable.
- Restart your computer.
If your HDMI isn’t showing up in playback devices, take a look at this guide about solving HDMI issues and solve the problem easily.
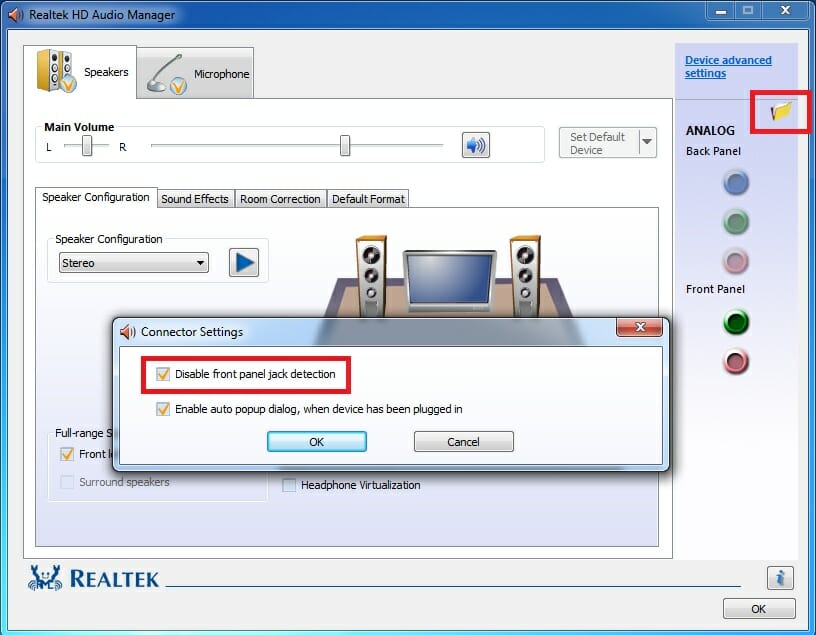
6. Disable the Front Panel Jack detection
- Go to Search, type realtek hd audio manager, and open Realtek Audio HD Manager.
- Then. go to the Speakers tab, and click the folder under Device Advanced settings.
- Select Disable front panel jack detection.
- Restart your computer.
If your Realtek HD Audio Manager isn’t opening in Windows 10, take a look at this article dedicated to fixing Realtek issues and learn what to do.
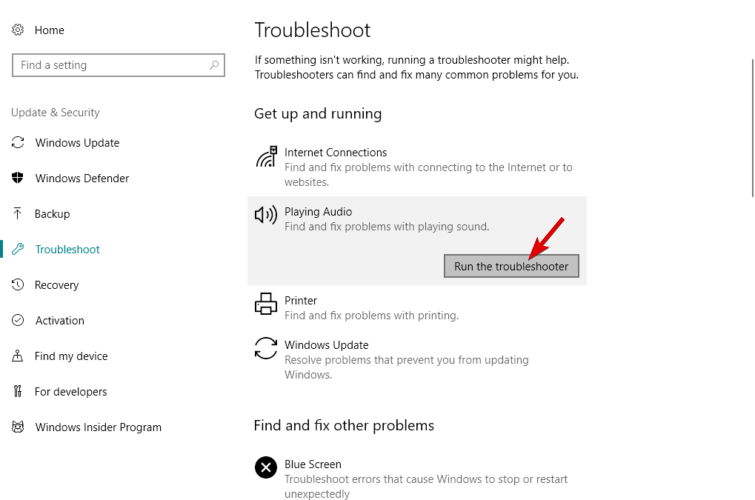
7. Run Sound Troubleshooter
- Go to the Settings app.
- Click on the Update & Security, then click on Troubleshoot.
- Click Playing Audio, and select Run the troubleshooter.
- Follow further on-screen instructions.
- Restart your computer.
If you’re having trouble opening the Setting app, take a look at this comprehensive article dedicated to Windows settings to solve the issue.
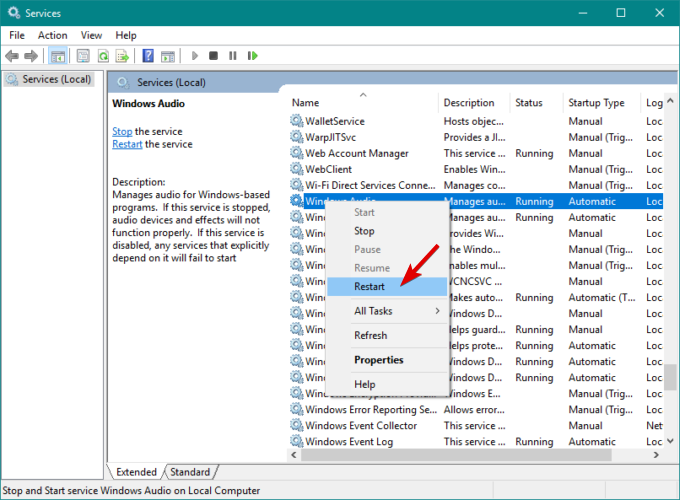
8. Restart the Windows Audio service
- Go to Search, type friend.com.vn, and open Services.
- Find the Windows Audio service.
- If this service is not enabled, right-click it, and select Start. If it’s enabled, right-click it and select Restart.
- Wait for the process to finish and restart your computer.
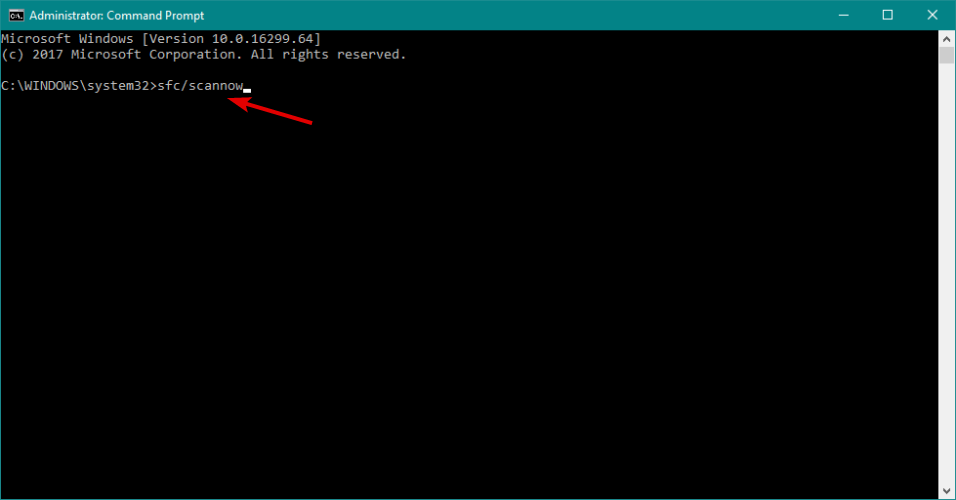
9. Perform an SFC scan
- Type cmd in Search, right-click Command Prompt, and select Run As Administrator.
- Then, type in the following command, and press Enter: sfc/scannow
- Wait for the process to finish.
- Restart your computer.
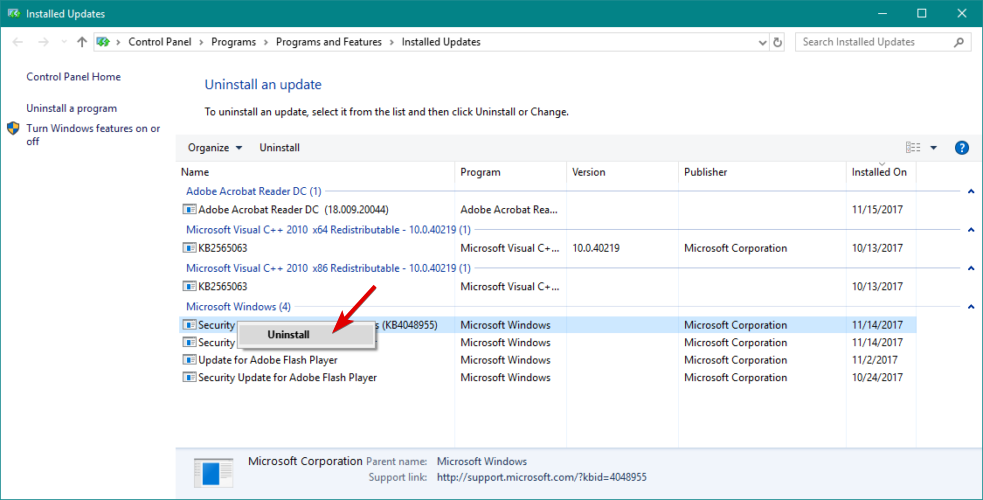
10. Delete Windows updates
- Open Settings, click on Updates & Security, and then on Windows Update.
- Go to Update history and click on Uninstall updates.
- Find the troublesome update, (it’s usually the latest installed update on your computer) right-click it, and go to Uninstall.
- Reboot your computer.
11. Perform a System Restore
- Open Control Panel
- Go to System and Security, then System.
- Under the Control Panel Home menu, click System protection.
- Click System Restore.
- Choose a Restore Point.
- Follow further on-screen instructions.
- Once you initiate the process, your computer will restart, and System Restore will get it to the selected previous state.
If you’re interested in more info on how to create a restore point and how would that help you, check out this simple article dedicated to creating restore points to find out everything you need to know.
12. No sound in specific apps
If the issue presents itself only in some applications make sure the volume is not set to minimal or disabled from the application option menu or the Windows 10 sounds menu.
Windows 10 has a specific sound volume for each of the applications opened on your machine, and to access those you need to tap or left-click the speaker icon on the right side of the taskbar and tap or click the mixer option on the bottom of the window.
That’s about it, we hope at least one of these solutions helped you resolve the annoying No speaker or headphones are plugged in problem in Windows 10.
For any other sound problems in Windows 10, check out this excellent guide dedicated to fixing sound problems on Windows to solve it.
If you have any comments, questions, or suggestions, feel free to let us know in the comments down below.
- Share CrocoBlock key trọn đời Download Crocoblock Free
- Cung cấp tài khoản nghe nhạc đỉnh cao Tidal Hifi – chất lượng âm thanh Master cho anh em mê nhạc.
- Hướng dẫn cách sử dụng tài khoản Grammarly đầy đủ và chi tiết
- Giá xe lăn bánh Innova 2016 sẽ là bao nhiêu? – Danhgiaxe
- cài driver mạng cho win 7 32 bit – friend.com.vn
- Clickbuy bị phốt lừa đảo, liệu có đáng tin
- Chi tiết Toyota Yaris Cross 2022 kèm giá bán (04/2022)
Bài viết cùng chủ đề:
-

Bí quyết bắt Pokemon không cần di chuyển
-

Làm Sim Sinh Viên,Chuyển đổi gói cước Viettel,Vinaphone,Mobile tại simredep.vn
-

Những phim có cảnh sex trần trụi bị cấm phát hành trên thế giới
-

Mạch đếm sản phẩm dùng cảm biến hồng ngoại – Học Điện Tử
-

6 Mẹo dân gian chữa rướn ở trẻ sơ sinh khi ngủ tự nhiên an toàn
-

Sao kê tài khoản ngân hàng ACB-những điều cần biết
-

Acer Iconia B1-723 – Chính hãng | Thegioididong.com
-

Cách khắc phục lỗi Voz không vào được bạn không nên bỏ qua
-

Tắt mở màn hình iPhone cực nhanh, không cần phím cứng – Fptshop.com.vn
-

[SỰ THẬT] Review bột cần tây mật ong Motree có tốt không?
-

Cách rút gọn link Youtube
-

Chèn nhạc trong Proshow Producer, thêm nhạc vào video
-

Hack Stick War Legacy Full Vàng Kim Cương Tiền ❤️ 2021
-

Cách chuyển font chữ Vni-Times sang Times New Roman
-

Du lịch Thái Lan nên đi tour hay đi tự túc? – BestPrice
-

Cách reset Wifi FPT, đặt lại modem wifi mạng FPT


