[Fix] The Selected Disk Has an MBR Partition Table – TechDim
Deprecated: trim(): Passing null to parameter #1 ($string) of type string is deprecated in /home/caocap/public_html/wp-content/plugins/fixed-toc/frontend/html/class-dom.php on line 98
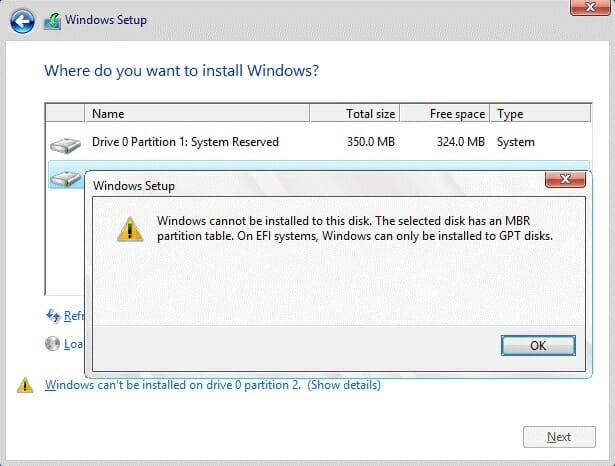
The selected disk has an MBR partition table is a common error message in windows just like Windows cannot be installed on this disk because it has an MBR partition. This error occurs when the user tries to install Windows operating system on their computer. This error happens when the partition table doesn’t support the installation process. If there is an EFI system in your device, the windows can only be installed on a GPT disk drive. If you have an MBR partition table, the installation process can’t be possible. And, when the error message occurs, you can’t complete the installation operation until you fix the issue mentioned just like an issue like the selected disk is of a GPT partition style.
For this, you can fix the error by either change the BIOS settings or change the MBR disk to a GPT disk. You have to go to the BIOS settings of your computer and change the EFI system to legacy mood. This legacy mode supports the MBR partition table and allows you to install windows on the MBR disk. The other way to fix the error is to change the MBR disk to a GPT disk. As the EFI system supports GPT disk, then, you can easily install windows in your computer operating system.
[Fix]: The Selected Disk Has an MBR Partition Table
We will mention various methods to solve the issue the selected disk has an MBR partition table.
Method 1: Change BIOS Settings
Step 1: First, you have to go to the BIOS setting of your device. You have to switch the current mood into SATA or legacy mood. You can easily boot into safe mode on your PC.
Step 2: Then, you have to restart your computer. When the computer starts booting, you have to open the BIOS. For this, you have to press Del or F10 to enter the BIOS. These keys can be different in your device. You have to check the BIOS key of the specific device. You may find the BIOS key on the computer screen when it is powered on.
Step 3: Once you enter the BIOS, you have to go to the Boot Devices.
Step 4: Under the Boot Devices, you have to find Boot order. There, you have to disable EFI sources. You have to set the DVD drive to SATA or Legacy Mode from UEFI.
Step 5: Now, you have to save all the changes and exit the window.
Step 6: Finally, you have to boot your computer with a system installing CD or USB flash drive. Then, you have to try to install the windows again.
Method 2: Convert MBR Disk to GPT With Command Line
Step 1: First, you have to move all your important data to the basic MBR disk.
Step 2: Then, you have to open the Command Prompt on your computer. For this, you have to type cmd in the search engine, or in Cortana and press Enter. From the search results, you have to select the Command Prompt.
Step 3: You have to right-click on the command prompt and select Run as Administrator from the menu bar.
Step 4: Once, you open the command prompt, you have to type diskpart in the command line.
Step 5: When you enter the DISKPART window, you have to type the list disk there. You have to note down the disk number which you want to convert to GPT.
Step 6: Now, you have to type clean in the DISKPART prompt. This command will clean all the partitions or volumes on the disk.
Step 7: Next, you have to type convert gpt in the DISKPART prompt.
Step 8: Finally, you have to close the window and check the error.
Method 3: Convert MBR to GPT Without Data Loss
Step 1: First, you have to download EaseUS Partition Master on your computer. You have to download the free version of the software.
Step 2: Then, you have to create a bootable disk of EaseUS Partition Master. You have to prepare storage media, like a USB drive, flash drive, or a CD/DVD.
Step 3: Now, you have to connect the drive properly to another bootable computer. You have to launch EaseUS Partition Master on your computer.
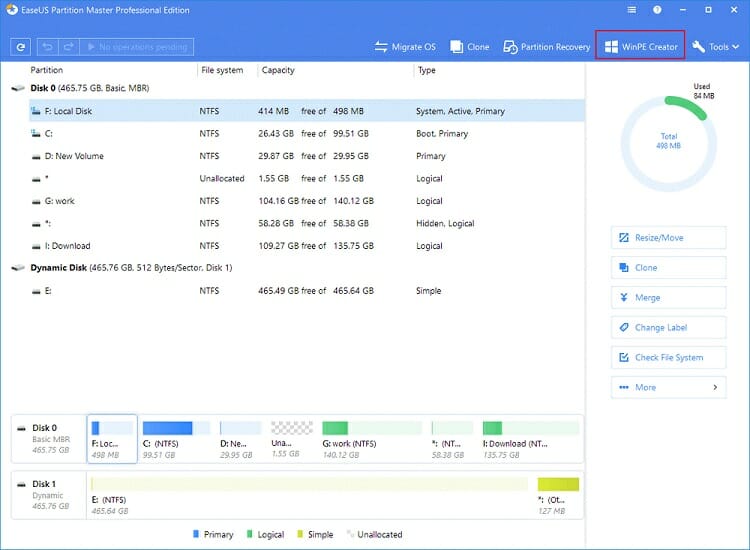
Step 4: Once, you open the software, you have to click on the “WinPE Creator” feature. You will find it at the top of the window.
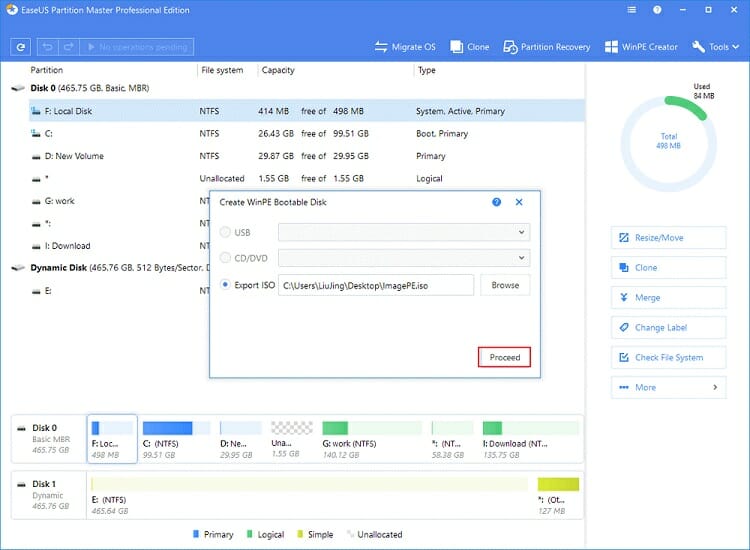
Step 5: Next, you have to choose a USB or CD/DVD. It depends on what device you connect to the computer.

Step 6: After that, you have to connect the WinPE bootable disk to the computer. Then, you have to restart your computer.
Step 7: Before booting the computer, you have to open the BIOS. For this, you have to press F2 or Del from the keyboard to enter BIOS. Then, you have to set to boot the PC from “Removable Devices”.
Step 8: You have to save the changes. For this, you have to press “F10” to save and then, exit.
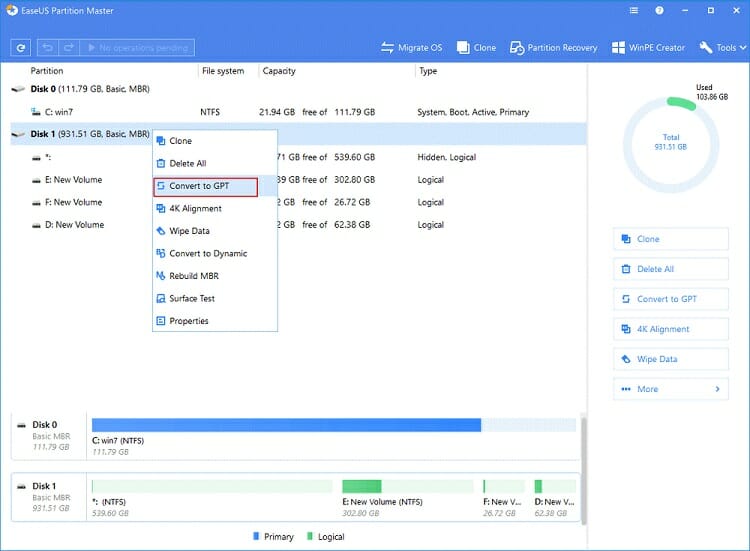
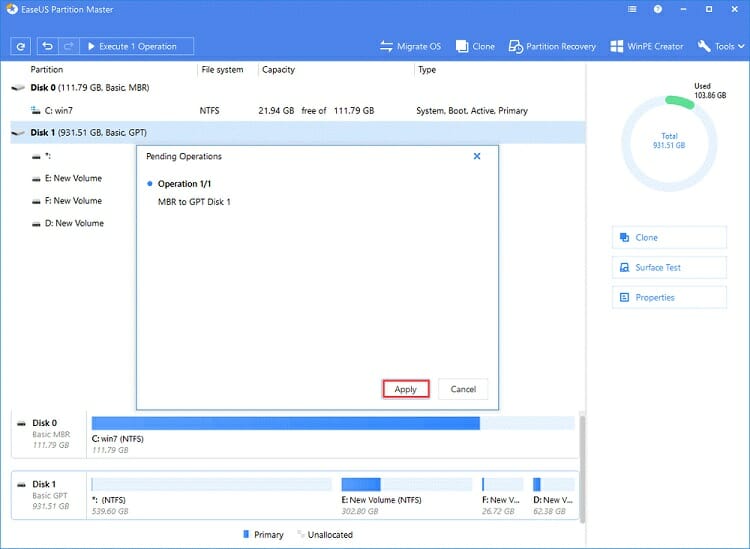
Step 10: Now, you have to right-click the GPT disk which you want to convert and then, select “Convert to GPT” from the menu.
Step 11: Finally, you have to click on the “Execute Operation” button. You will find it at the left corner of the top of the window and click “Apply” to start the converting process.
Method 4: Convert MBR to GPT with Disk Management
Using Disk Management, you can convert the MBR disk to a GPT disk. But, in this method, the files can be missing. So, before applying this method, you have to make a backup of your important files.
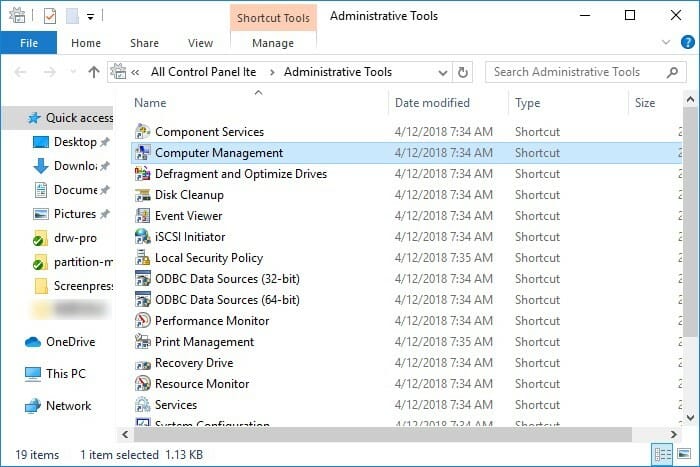
Step 1: First, you have to open the Computer Management on your computer. You can open it in two ways. Firstly, you have to go to Control Panel and run it as an administrative tool. There, you have to choose “Computer Management”. In a second way, you have to simply right-click on “This PC” on your computer. There, you have to choose “Manage” and select Computer Management.
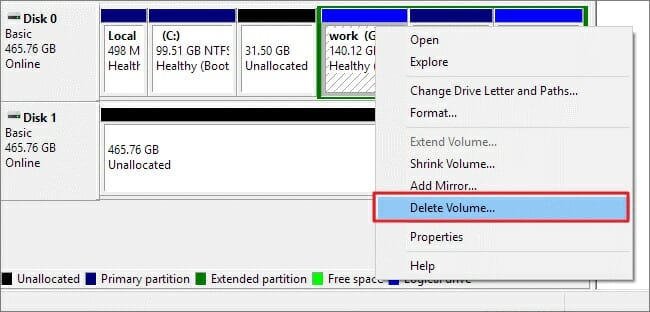
Step 2: Once, you enter the computer management, you have to delete the MBR Volume. You have to click on “Disk Management” at the top of the window. There, all the disk volumes will appear. You have to right-click on any volume and choose “Delete Volume” from the menu bar. You have to continue the process to delete all the volumes.
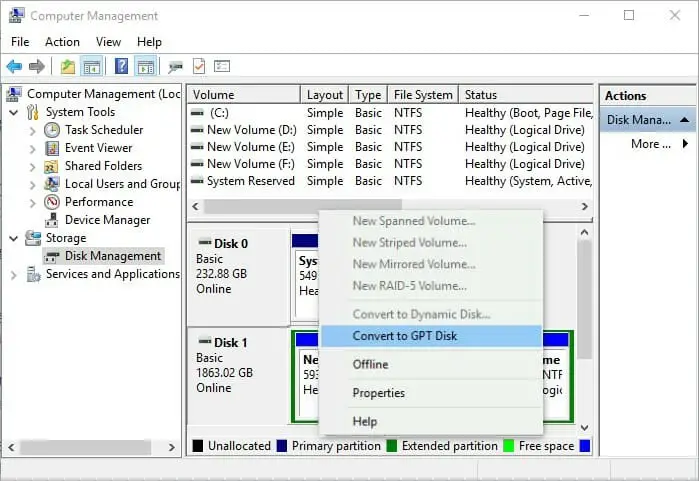
Step 3: Finally, you have to right-click on the MBR disk and choose the “Convert to GPT Disk” from the menu bar.
Method 5: Convert MRB to GPT with DiskGenius
Step 1: First, you have to download DiskGenius Free. You have to download the free version of this software. Then, you have to install the app.
Step 2: Then, you have to select the MBR disk which you want to convert to GPT.
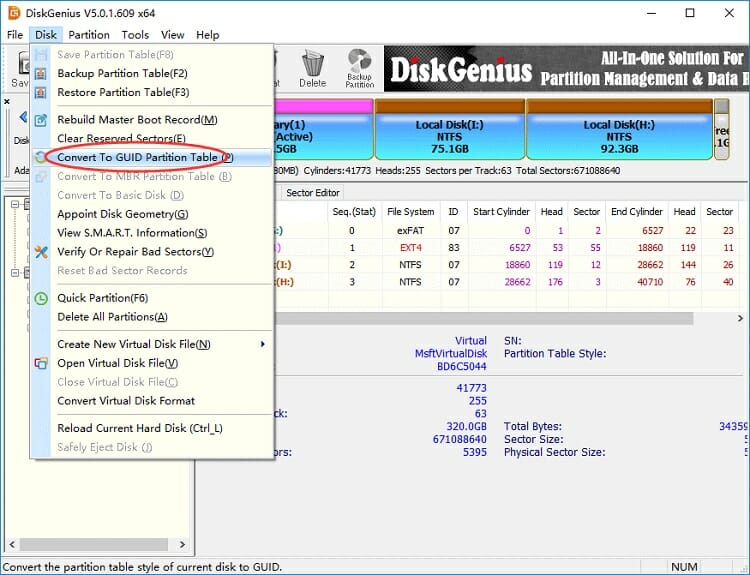
Step 3: Once, you open the software, you have to right-click on the Disk menu and choose Convert To GUID Partition Table from the menu bar.
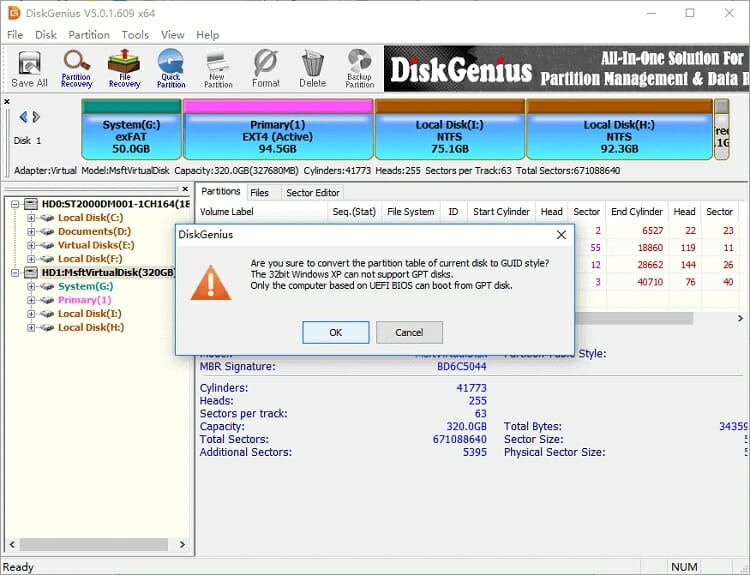
Step 4: Next, you have to click OK.
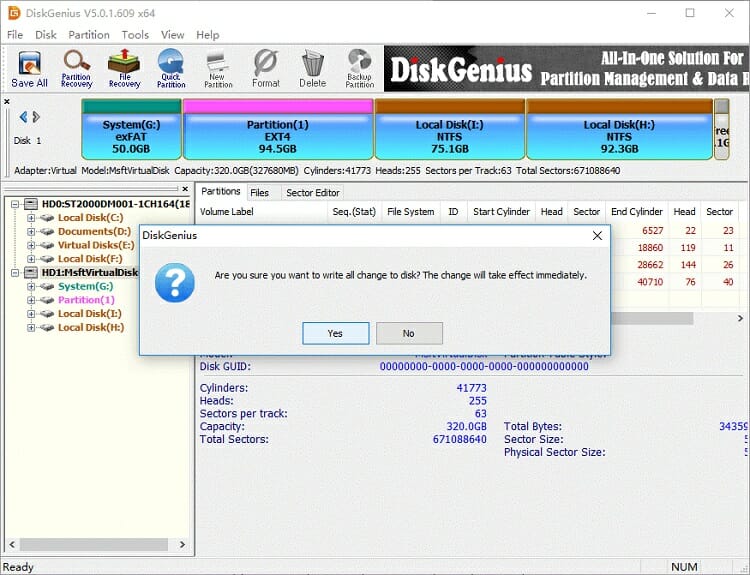
Step 5: Finally, you have to click Save All button to save the changes and then, exit.
At this point, now you must have a clear idea about different types of partition table for Hard disk and SSD. You can also learn about the functionalities and one kind of comparison between MBR and GPT partition.
Conclusion
When you face the error message the selected disk has an MBR partition table that indicates that you are using an MBR partition disk and your computer’s operating system doesn’t compatible with the disk to install the windows. Until you solve it, this error message frequently comes to the screen.
- Share CrocoBlock key trọn đời Download Crocoblock Free
- Cung cấp tài khoản nghe nhạc đỉnh cao Tidal Hifi – chất lượng âm thanh Master cho anh em mê nhạc.
- Mẫu đơn cớ mất 2021 – Mẫu đơn cớ mất giấy tờ mới nhất – friend.com.vn
- Dịch vụ vận chuyển gửi xe máy đi vào Sài Gòn – TPHCM uy tín giá rẻ | Proship.vn
- Top 10 địa chỉ hãng xe Yamaha TPHCM nên xem Yên Xe Phú Quang
- Lời bài hát: Em Băng Qua [Lập Nguyên] [Kèm Hợp Âm] – Nhachay.vn
- Cách tắt tiếng, tách âm thanh ra khỏi video bằng ProShow Producer
Bài viết cùng chủ đề:
-
Printer | Máy in | Mua máy in | HP M404DN (W1A53A)
-
5 cách tra cứu, tìm tên và địa chỉ qua số điện thoại nhanh chóng
-
Công Cụ SEO Buzzsumo Là Gì? Cách Mua Tài Khoản Buzzsumo Giá Rẻ • AEDIGI
-
Cách giới hạn băng thông wifi trên router Tplink Totolink Tenda
-
Sự Thật Kinh Sợ Về Chiếc Vòng Ximen
-
Nên sử dụng bản Windows 10 nào? Home/Pro/Enter hay Edu
-
"Kích hoạt nhanh tay – Mê say nhận quà" cùng ứng dụng Agribank E-Mobile Banking
-

Cách gõ tiếng Việt trong ProShow Producer – Download.vn
-

Câu điều kiện trong câu tường thuật
-

Phân biệt các loại vạch kẻ đường và ý nghĩa của chúng để tránh bị phạt oan | anycar.vn
-

Gỡ bỏ các ứng dụng tự khởi động cùng Windows 7
-
Cách xem, xóa lịch sử duyệt web trên Google Chrome đơn giản
-
PCI Driver là gì? Update driver PCI Simple Communications Controller n
-
Sửa lỗi cách chữ trong Word cho mọi phiên bản 100% thành công…
-
Cách reset modem wifi TP link, thiết lập lại modem TP Link
-
Thao tác với vùng chọn trong Photoshop căn bản


