How to Use the Add Photo Feature to Make Awesome Overlays – Picsart Blog
Photographic beauty is only pixels deep, but you can make the most of your shot with after-effects like layering. Overlays are an easy way to add depth and detail to any photo, and they look especially great on portraits.
An overlay is essentially a picture placed on a picture. In photographic terms, it’s referred to as a double exposure. Here’s a real-world example. Imagine looking at a garden through a window, upon which you can see the plants reflected on the glass pane. From behind the window, you can appreciate both the garden as well as the interesting visual effect created by the reflection. Photo editing applications and software can superimpose images in these ways.
An overlay photo is more transparent than the background photo, which means that the viewer looks through one image to discover another. Depending on the overlay photo’s level of transparency and detail, the background image may be easier or more challenging to make out. If the overlay image is dense or opaque, a viewer will see less of the background image than if the overlay image is sparse or very transparent. Neither of these transparency options is right or wrong; it all comes down to taste. So, follow your creativity where it leads when adding overlays to photos.
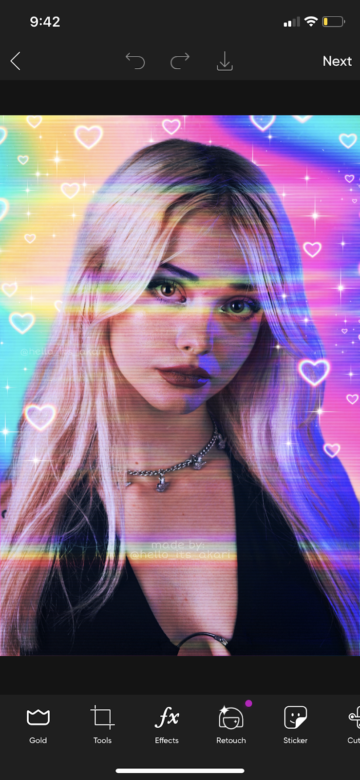
Overlays aren’t necessarily meant to look realistic. This effect will instead make your photo look hip and fantastical, perhaps a bit avant-garde. So, have fun while using this feature. We recommend deciding on your background image before you start designing but letting your creativity run free when choosing the overlay. In our stock image library, you can find photos that were practically made to be overlays — everything from tropical fronds to otherworldly rainbows. What’s more, placing an overlay on an image is so simple that you can quickly change up your design as needed.
1. Open the Picsart mobile app and select the purple plus sign at the bottom of the screen to start a new project. You will be able to see your photo library.

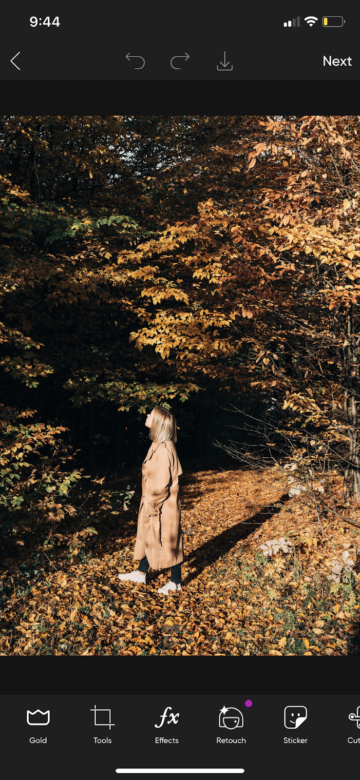
2. Select the photograph you wish to use as your background photo, and you’ll be taken to the editing screen.
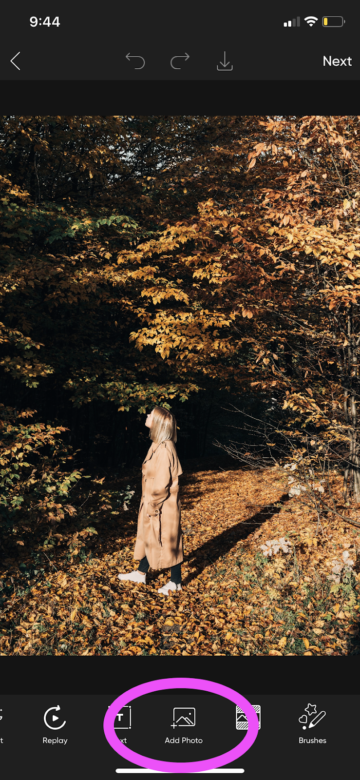
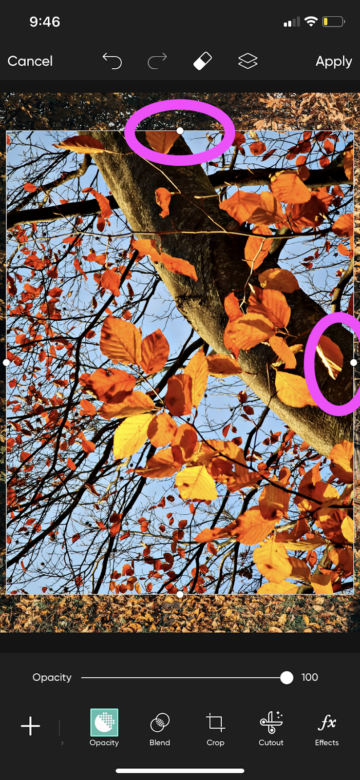
3. Scroll to the right on the menu at the bottom of the screen until you find the “Add Photo” option. Click on the icon.
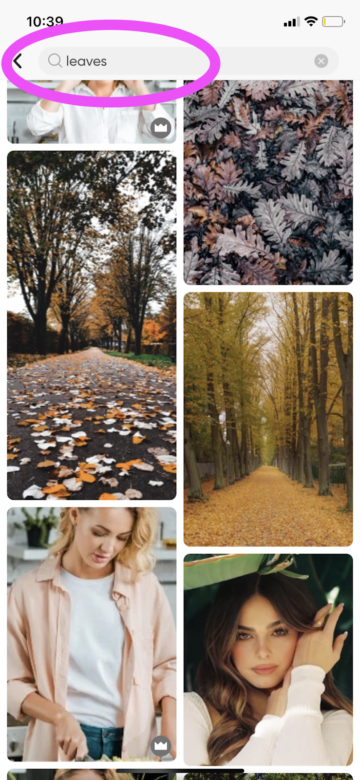
4. Select your overlay image from your personal library or search for the perfect photograph among our free images. Use keywords like “leaves” or “rainbow” to search for exactly what you’re looking for. Remember, the sky’s the limit, so be daring in your choices.
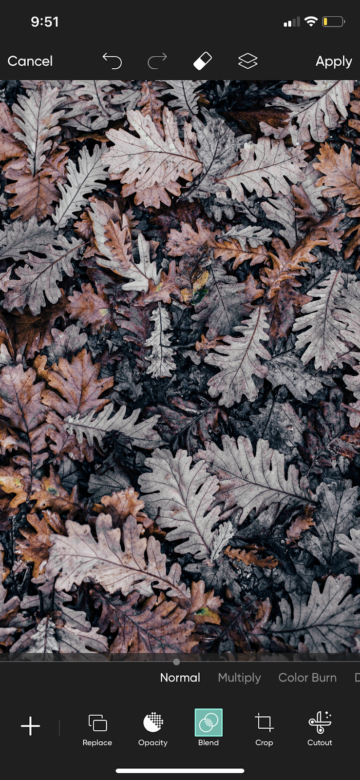
5. Once you select your overlay photo, the app will take you back to the editing screen. The overlay photo will be completely opaque, meaning that it will cover up the background image. But don’t panic. Trust the process and stretch the overlay photo out to the canvas edges, fully covering the image below. You’ll be able to fix the transparency in the next step.
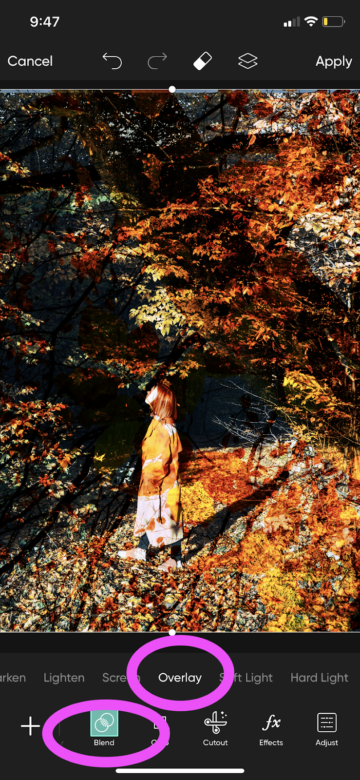
6. It’s time to let our app do the work. Instead of fiddling with transparency settings yourself, simply look for the “Blend” tool at the bottom of the screen. Here, you will find several options for changing the photo’s transparency in the foreground, but we recommend starting with the most obvious: “Overlay.”
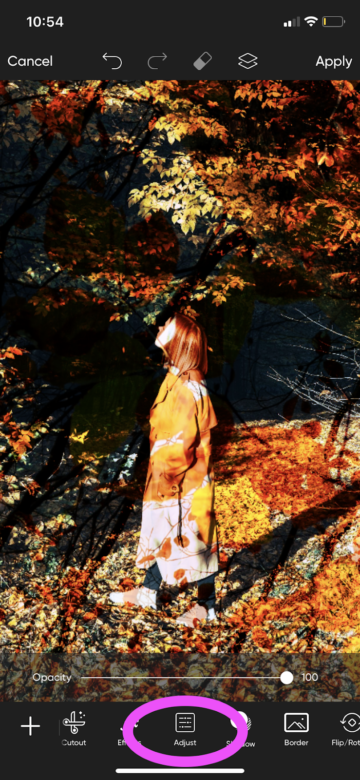
7. If you’re happy with your effect, you can stop here and jump down to the final steps of this tutorial that describe how to save your work. That said, there are a few things you can do to tweak your overlay and make it even more fun. The first of these options is changing the color. Choose “Adjust” from the menu at the bottom of the screen to bring up different editing options.
8. Now, select “Hue” and use the slider to shift the color of the overlay. For a surprising effect, choose colors that are opposite to those in the background photo, such as the bright pink shown here.
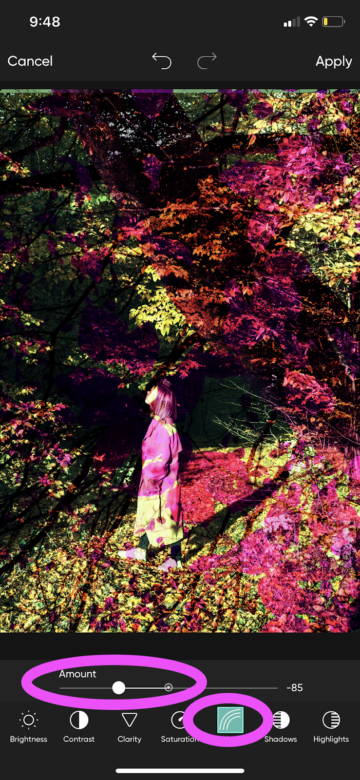
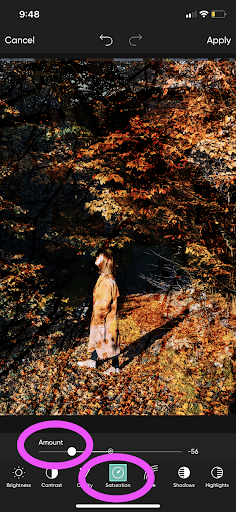
9. For a more natural effect, leave the hue alone and instead play with the saturation of the overlay — the lower the saturation, the subtler the overlay effect. Select “Saturation” from the menu at the bottom of the screen and move the slider to intensify or lessen the effect.
10. If you’re happy with your project, you can skip down to the end of this tutorial for information on how to save your image. Not completely convinced? No problem. Remember how we said switching out an overlay is essentially effortless? As proof, we’ll quickly demonstrate how to start over with a different overlay image and effect.
11. Get back to step 3. You can click the undo arrow at the top of your screen to get back to your background photo, or you can follow steps 1 and 2 to start your project anew. Once your background image is on the screen, follow steps 3 and 4 to add a new overlay photo. Just as we did above, stretch the overlay out to the borders of the canvas, completely covering the photo below.
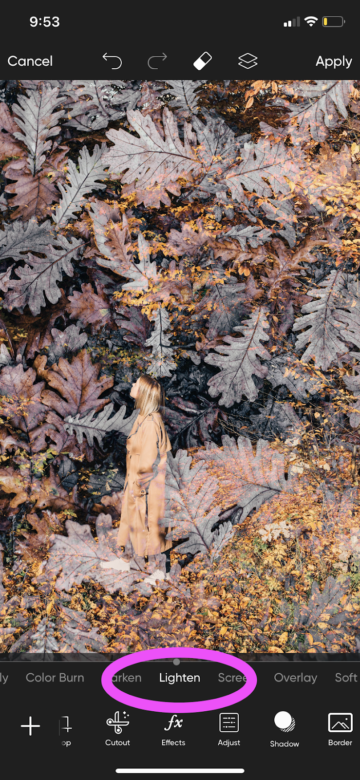
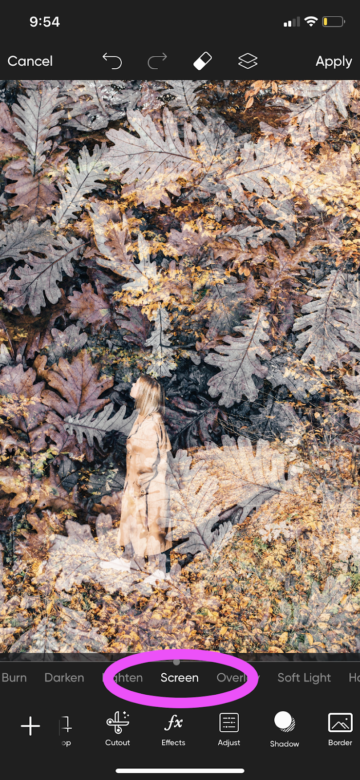
12. Choose the “Blend” tool from the menu on the bottom of the screen as we did in step 6. This time, however, don’t choose “Overlay.” Instead, play around with other layering effects like “Lighten” and “Screen.” Both of these will make the overlay image more transparent, though not as much as in the previous example. Now that you’ve gotten the hang of changing these blending settings, try all of them on for size. There’s no correct answer for every photo, so select the option that looks best to you.
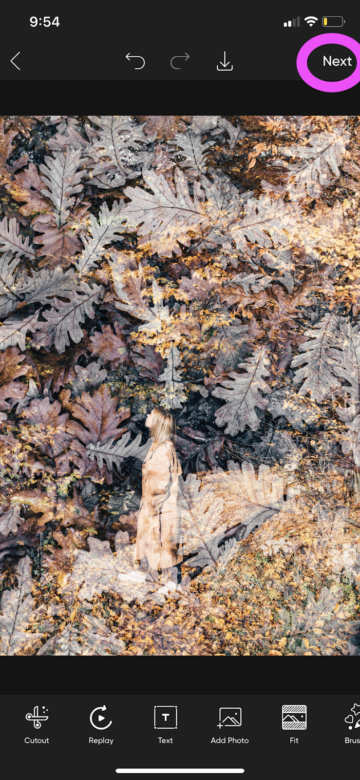
13. When you’re satisfied with your image, click “Next” in the upper right-hand corner of the screen. A quick tip: remember to click “Apply” on every editing step along the way to get your effects to take.
14. On the sharing screen, choose whether to save the image or post it directly to social media. We recommend always saving a copy to your phone so that you can use the image again later.
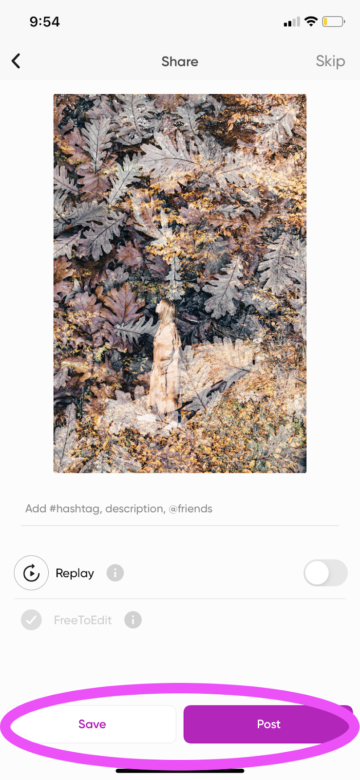
Pro tip: if you choose to save your finished image, you’ll have the option to save your project as well. Saving your project allows you to make future edits quickly, so if you think you might tweak your image later, it’s a good idea to save the project as well as the image itself.
Create at the Speed of Culture
Picsart is a full ecosystem of free-to-use content, powerful tools, and creator inspiration. With a billion downloads and more than 150 million monthly active creators, Picsart isn’t just the world’s largest creative platform; we’re also the fastest growing. Picsart has collaborated with major artists and brands like BLACKPINK, the Jonas Brothers, Lizzo, Sanrio: Hello Kitty, I am a Voter, Bebe Rexha, Maroon 5, One Direction, Warner Bros. Entertainment, iHeartMedia, Condé Nast, and more. Download the app or start editing on web today to enhance your photos and videos with thousands of quick and easy editing tools, trendy filters, fun stickers, and brilliant backgrounds. Unleash your creativity and upgrade to Gold for premium perks!
- Share CrocoBlock key trọn đời Download Crocoblock Free
- Cung cấp tài khoản nghe nhạc đỉnh cao Tidal Hifi – chất lượng âm thanh Master cho anh em mê nhạc.
- Tổng hợp 16 phần mềm xem ảnh trên Win 10 tốt nhất – GhienCongNghe
- Nếu còn có ngày mai – Tập 38: Duyên vào tù, Ngọc qua đời sau ca phẫu thuật | friend.com.vn
- Top 10 điện thoại cục gạch 2 sim dưới 500k bán chạy nhất TGDĐ – friend.com.vn
- Cách lấy số điện thoại bạn bè từ Zalo nhanh chóng, mới nhất – friend.com.vn
- GDP danh nghĩa là gì (Nominal GDP) Khác với GDP thực tế thế nào?
Bài viết cùng chủ đề:
-

Hướng dẫn kết nối điện thoại với loa mini đơn giản hiệu quả nhanh nhất
-
Top 12 phần mềm, web chuyển mp4 sang mp3 online, miễn phí, dễ sử dụng
-
Hình nền máy tính 4K cực đẹp – Tổng hợp hình nền, Wallpaper 4K đẹp cho máy tính
-
Cách chạy file DMG trên Windows, mở, xem file DMG trên máy tính
-
Bật Gps iPhone 6, bật tắt định vị trên điện thoại
-
Kaspersky Key ( Free 91 days ) new update 2019 – All Product Key
-
Cách giảm dung lượng video trên máy tính và điện thoại
-
Sửa lỗi mã hóa ký tự bị hỏng, bị lỗi trên Word 2019, 2016, 2013, 2010
-
Hỏi đáp: ăn chay ăn trứng gà công nghiệp có được không
-

10 Chuyện Tâm linh có thật – Nơi thế giới vô hình huyền bí
-

Hướng dẫn xử lý lỗi iphone 6 plus không nhận vân tay
-

Perfect Money là gì? Hướng dẫn sử dụng PM mới nhất 05/10/2021
-

100+ Hình nền, ảnh Anime nữ cute girl, dễ thương máy tính, điện thoại
-

Làm Sim Sinh Viên,Chuyển đổi gói cước Viettel,Vinaphone,Mobile tại simredep.vn
-

Bí quyết bắt Pokemon không cần di chuyển
-
Mạch đếm sản phẩm dùng cảm biến hồng ngoại – Học Điện Tử


